How to access cPanel with an unmanaged VPS
If you choose the cPanel Control Panel option when you order an unmanaged VPS, you have access to both WebHost Manager (WHM) and cPanel. This article shows how to access cPanel through WHM on an unmanaged VPS.
- Remember that by default, unmanaged VPS plans do not include cPanel.
- If you want to add cPanel to your existing unmanaged VPS account, please open a support ticket with our Guru Crew on the Customer Portal at https://my.a2hosting.com.
- If you want cPanel installed by default on your server and updated regularly by A2 Hosting support, you should consider a Managed VPS instead. For more information about our Managed VPS plans, please visit https://www.a2hosting.com/vps-hosting/managed/.
To access cPanel on an unmanaged VPS, follow these steps:
- Log in to the Customer Portal.If you do not know how to log in to the Customer Portal, please see this article.
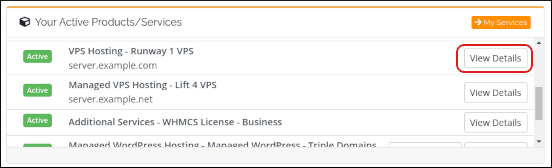
- In the Your Active Products/Services section, locate your unmanaged VPS, and then click View Details:
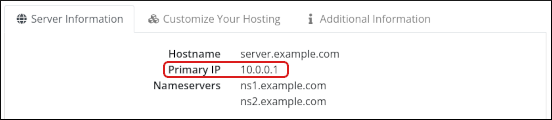
On the Server Information tab, note the IP address in the Primary IP field:
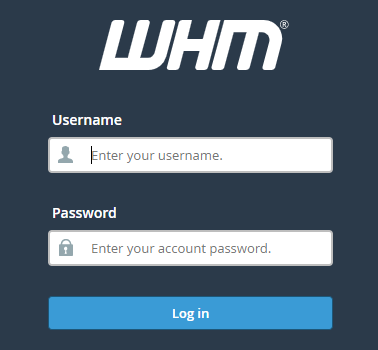
Use your web browser to go to https://xxx.xxx.xxx.xxx:2087, where xxx.xxx.xxx.xxx represents the IP address you obtained in step 3. The WebHost Manager (WHM) login page appears:
 WebHost Manager (WHM) enables you to manage customer accounts from one convenient interface. You use WHM to create an account for logging in to cPanel. For more information about WHM, please see these articles.
Type your username and password, and then click Log in.
- If you do not know your username, in the Customer Portal, click the Additional Information tab to view it.
- If you cannot remember your password, you can reset it. To do this, in the Customer Portal, in the VPS Information section, click the Settings tab, and then click Change Password:

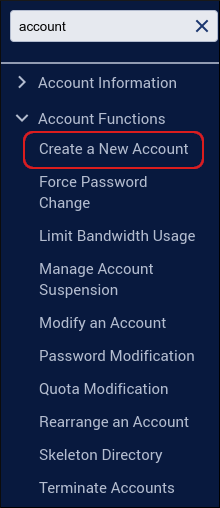
You must create a new account to use for accessing cPanel. To do this, in the search box at the upper left of the WHM screen, start typing account, and then click when it becomes visible:
On the Create a New Account page, complete the fields:
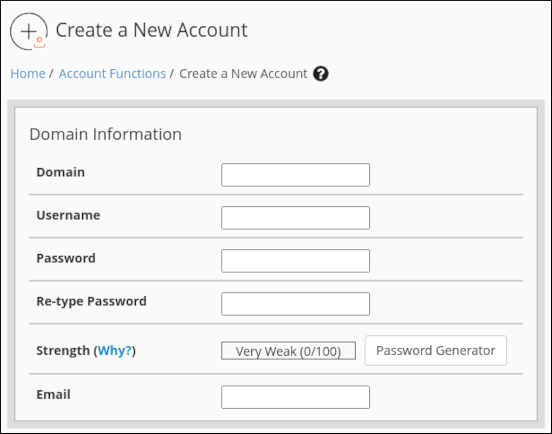
- At the bottom of the page, click Create.
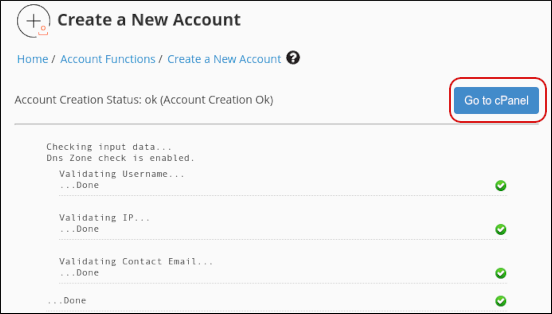
After WHM creates the account, you are redirected to the Account Creation Status page. At the top of the page, click Go to cPanel:
The cPanel home page appears.
After you have created your account in WHM, you can access cPanel from the List Accounts page. To do this, in the search box at the upper left of the WHM page, start typing account, and then click when it becomes visible. On the List Accounts page, locate the account, and then click the cPanel icon:

Article Details
- Operating System: Linux Hosting
- Product: Unmanaged VPS
- Level: Intermediate
Grow Your Web Business
Subscribe to receive weekly cutting edge tips, strategies, and news you need to grow your web business.
No charge. Unsubscribe anytime.
Did you find this article helpful? Then you'll love our support. Experience the A2 Hosting difference today and get a pre-secured, pre-optimized website. Check out our web hosting plans today.